Saturday, May 4, 2013

Conor's First Solo Swim Lesson

Please pardon the delay.... this post should have happened a few weeks ago, but that silly busy life thing got in the way. So, without further ado...

Once Conor turned 3, he was eligible to take solo swim lessons. What are solos swim lessons? I'm glad you asked! He no longer needed a parent in the water with him AND (this is the part we're most excited about) he and Annika could take lessons at the same time. We officially were able to say adios to making two trips to the pool each Sunday - HURRAY!!!!

Conor was a bit unsure of getting in the pool all on his lonesome, but quickly worked his way over that hurdle. A big plus is his teacher was the same person he had during his previous swim lessons. The kids started out standing on a platform that keeps them at about tummy level in the water; then, the teachers take them out into the pool (1:1) to practice kicking, blowing bubbles, using their arms to reach and pull, etc. About mid-way through the class, Conor started warming up to the idea of being in the pool without Eric or me with him. I think the turning point was when his teacher put him on a big yellow floating thing with another little one and zoomed them past Annika's swim class. Conor loved being able to wave at Annika and get a response from her. (Side note: This same teacher also used to be Annika's teacher; he's pretty darned familiar with our family at this point!) By the end of the class, Conor was happily blowing bubbles and sticking his face in the water.

A few weeks into the lessons, he is proving to be a little fish, just like his sister, and LOVES going to swim lessons.

A wee bit apprehensive at first

Kick! Kick! Kick!

Still not quite so sure of the whole thing

Annika LOVING her lesson

Look at her go!

Getting a bit braver

Kicking away

Pool fun!!

Friday, May 3, 2013

3-Day Cookie Bouquet

One of my co-workers recently approached me and asked if I'd be willing to make something for the dessert dash portion of her upcoming Komen 3-Day fundraiser. OF COURSE I'd help her out. Baking and helping breast cancer research ... win and win! After pondering a few ideas (including breast cakes, breast cupcakes, etc.), I settled on making a pink ribbon cookie bouquet.

I used the cookie and royal icing recipes that I almost always use... they are definitely tried and true. The twist to this project was the colored sugar used to decorate the cookies. Until now, I never really had much success getting the sugar to stick like I wanted. A few days ago, I looked online to see if I could find any tips and one video I saw on YouTube suggested not using water, but using a 1:1 ratio of water and meringue powder to adhere the sugar to the dried cookies. I tried the method and will never look back; it worked perfectly!

I filled a jar with curly pink ribbon and used and inverted Styrofoam cone to assemble the bouquet. This morning, I carefully wrapped it with plastic wrap and hauled it (ever so carefully) on the bus with me. Fortunately, it got to the office safe and sound!


Wednesday, May 1, 2013

Our beautiful babies

Can't say enough about how much we adore these sweet little faces!


Monday, April 29, 2013

Whole Lemon Tart (ala Smitten Kitchen)

As the Dessert Dash coordinator for Annika's school auction, it seemed only fitting that I should actually make a dessert. In fact, I've donated cakes over the past two years and decided this was a good time to jump in as a volunteer on the committee. As the coordinator, I saw just how many cakes people signed up to donate, which made me start thinking outside of the cake box (hahaha!) when deciding what I should make.

The idea of checking the Smitten Kitchen blog struck fairly quickly, so I took a stroll through her dessert section. A few of items jumped out as possible contenders, but then I came across the Whole Lemon Tart recipe and a little choir of angels sang in my ears... ok, not really, but I was inspired nonetheless!

Before making it for the auction, I decided doing a trial run was the smart choice. Eric's best friend and his daughter came over for dinner last night, so I made the tart as our dessert. I didn't use the tart crust recommended in the recipe; instead, I used the tart crust recipe that I learned in the pie-making class I took awhile back at a local baking shop/culinary classroom. I knew it was tried and true ... and mighty tasty.

The thing about this tart recipe that caught my attention was the entire lemon (minus the seeds) is used... not just some zest and the juice, but THE WHOLE LEMON! Per the recipe, I sliced it (thin) and then put it (along with sugar and butter) in the food processor bowl and let 'er rip until everything is pureed! Talk about easy! After the initial whirl, I added the remaining ingredients and then poured the batter into my pre-baked tart shell. The biggest stress was wondering if the tart would be cool enough to serve for dinner (I didn't start the baking process until after we got home from the kids' swim lessons a smidge before 3!

The recipe couldn't have been easier and turned out mighty nicely. The lemon flavor was present but not overpoweringly tart. (In fact, I think I'll add a bit more lemon zest when I make it for the auction) I think Eric put it best when he said the tart reminded him of the lemon bars that I make.

I forgot to take a picture of the whole tart, so this single piece will have to suffice ... it
was the last man standing after I  took the leftover tart to work this morning.


Whole Lemon Tart (ala Smitten Kitchen)

Loosely inspired by a version from the Paris pastry shop, Rollet-Pradier

  • 1 partially baked 9-inch Great Unshrinkable Tart Shell, or your favorite sweet tart shell
  • 1 average-sized lemon (about 4 1/2 ounces; 130 grams), rinsed and dried*
  • 1 1/2 cups (300 grams) sugar
  • 1 stick (4 ounces or 115 grams) unsalted butter, cut into chunks
  • 4 large eggs
  • 2 tablespoons (14 grams) cornstarch
  • 1/4 teaspoon table salt

Center a rack in the oven and preheat the oven 350°F (165´C). Place the tart shell on a baking sheet, which you can line with foil or parchment paper to make any spills a breeze to clean up.

Slice the lemon into thin wheels, remove any seeds, and toss the rounds — lemon flesh and peel — sugar and chunks of butter into the container of a food processor. Process, scraping down the sides of the container as needed, until the lemon is thoroughly pureed. Add the eggs, cornstarch and salt and pulse until the batter is smooth.

Pour into prepared tart shell. It will fill it completely but if due to slight variances in tart pans, egg sizes, lemon sizes or crust thickness, you have too much, do not pour it past the top of of your crust or it will become difficult to unmold later.

Bake for 35 to 40 minutes or until the filling is set. You can test this by bumping the pan a little; it should only jiggle slightly. In my oven, I find that the point at which the filling is set is also when it starts to get very light brown on top.

Let cool on rack, unmold tart pan and serve. I actually prefer this tart completely chilled, which makes it a great dessert to make in advance of a dinner or party.

* Meyer lemons are the first choice here. They’re milder with thinner skin. But if you know that you do not mind a stronger lemon and rind kick, feel free to use a regular lemon, which will have a stronger flavor and a higher proportion of skin to flesh. If your lemon is not 4 1/2 ounces (Meyers often weigh in closer to 4 ounces) go ahead and cut a wedge out of a second one to keep the lemon flavor in balance with the sweetness of the tart.

Saturday, April 27, 2013

April 2013 Daring Bakers Challenge: Savarin

This month's Daring Bakers challenge was to make a savarin, which is a yeast-based cake. I'd never heard of this kind of cake and was anxious to give it a try.

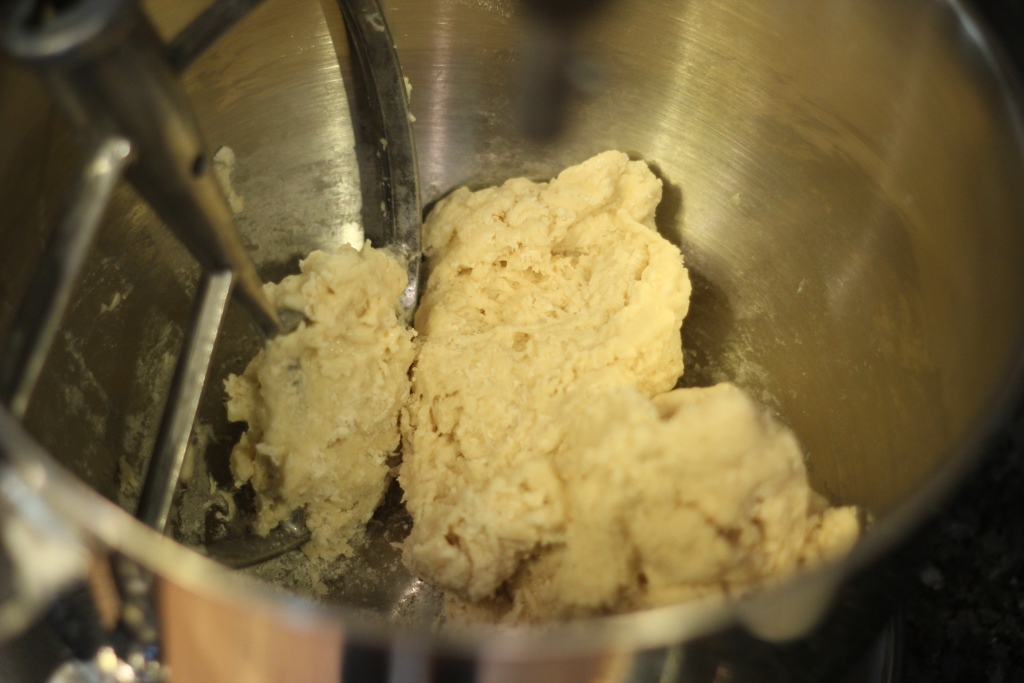
The savarin began much as many of my bread recipes do ... by creating a yeast-based sponge. After letting it come to life, the sponge was incorporated into the remaining ingredients and left to rise. Fortunately for me, I had a very good supervisor (aka Conor) who oversaw much of the process. After creating the dough, I was instructed to poke a hole in the middle of the dough and then place it in a savarin pan, I used my standard bundt pan and think it worked grand and dandy. My dough never puffed up to the top of the pan, like the instructions indicated, but, again, I don't think that made a big difference.

As the cake baked, I made the pastry cream (YUM). I also made the flavored soaking syrup. This is where I deviated from the original recipe a bit.The original recipe called for peach tea and peach syrup, neither of which were in our pantry. Instead, I used the kiwi liquor that Eric and I bought in New Zealand back in 2003 but had never opened. Of course, we had to sample it before using it in the recipe. My, but that stuff was tasty!!

After the cake was done baking, I let it cool and decided to follow the recipe's suggestion of letting it dry out a bit so it could soak up more of the syrup. Unfortunately, I think I let it dry out too much. The final product was a bit on the dry side. On an up note, the lemon zest added to the pastry cream was amazing!


Sponge


Working the sponge into the dough

My manager

Mixin, mixin, mixin

Nothing gets past this guy!

Dough ready for the pan

Rising complete, ready for the oven

YUM

Annika and Conor modeling the final savarin

Savarin

Natalia of Gatti Fili e Farina challenges us to make a traditional Savarin, complete with soaking syrup and cream filling! We were to follow the Savarin recipe but were allowed to be creative with the soaking syrup and filling, allowing us to come up with some very delicious cakes!

Tuesday, April 23, 2013

Weekend of Sick Kiddos

Over the past few months, our weekends have been jam packed with various activities. I mean PACKED!! This past weekend was our first in a looooong time that was without plans, aside from swim lessons, of course. Even though our previous weekends were filled with fun things, knowing a quiet weekend was ahead of us was something I looked forward to.

Then a stomach bug attacked our kids.

The quiet, relaxed weekend turned into a weekend full of hurting tummies and cleaning up barf. Oh yeah, we totally know how to kick back!! On an up note, because this was our quiet weekend without plans, we didn't have to cancel anything (aside from swim lessons, of course).

We set up a sick bay in the TV room and had the kids lay low all day. They napped, they watched TV, they snuggled with the heating pad, they barfed.... correction, only Conor did that, but he picked up his sister's slack in that department. Fortunately, our kids are willing to nap when they don't feel well; in fact, we didn't put anyone down for a nap on Sunday, yet both kids took at least 2 naps.

From a mom's standpoint, it is horrible to see your kids sick. If they're injured, you kiss the owie, put some ice on it, and call it good. When they're sick, you just have to wait it out and feel helpless (while holding a bucket in front of your child). I hated knowing I couldn't fix what ailed them; I did what I could to help them through it, but that isn't the same as fixing it, huh?

Fortunately, by yesterday afternoon, the kids had recouperated enough to play with and annoy each other. Once again, all is right in the world.

Our little sickies

Thursday, April 18, 2013

Silly boy

Conor and I are home today because he had an every-so-slight fever (as in 99 degrees) at the end of his day at day care yesterday. A few minutes ago, he told me that he wanted ponytails in his hair. Sure - why not! The result was one of the funniest pictures I think I've taken of him thus far. Enjoy!