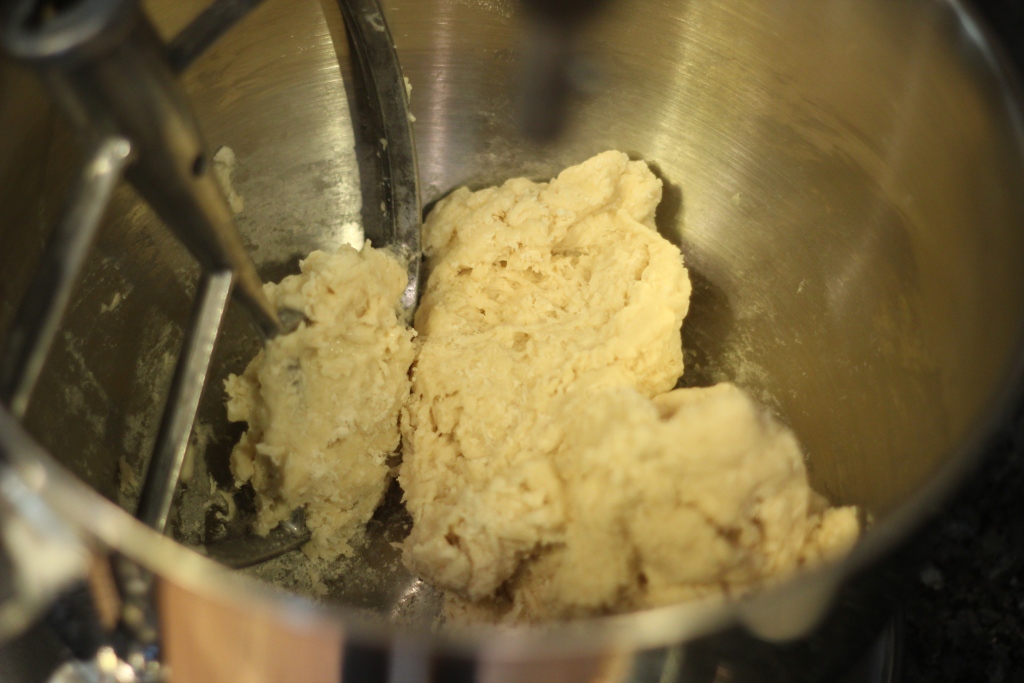
This month's Daring Bakers' challenge was right up my alley: BREAD!! More specifically, we were challenged to make focaccia from scratch.
The timing for this challenge couldn't have been more perfect, considering my new addition to the book "Flour, Water, Salt, Yeast", which is ALL about bread making. Every recipe provided in this book yields two loaves of bread, and many recipes are adaptable, meaning you don't have to make the same kind of final product with both halves of the bread. So, I made bread by following the "Overnight White Bread" recipe, and made half of dough into a lovely artisan loaf and the other half into focaccia.
Conor helped me make the focaccia's dimples, and he was in charge of brushing the olive oil on the top of the bread... hence, we had uneven dimples and areas of oil slick on the bread, but it all worked out!
I topped the focaccia with parmesan cheese and salt... all four of us gave the bread our thumbs up. Definitely going to make it again!
For the month of April Rachael of pizzarossa and Sawsan of Chef in Disguise took us on a trip to Italy. They challenged us to try our hands at making focaccia from scratch
Showing posts with label Daring Baker's Challenge. Show all posts
Monday, April 27, 2015
Friday, March 27, 2015
March 2015 Daring Bakers' Challenge: Tarte Tatin
This month's Daring Bakers' challenge was the ever-lovely tarte tatin... aka an upside down one-crusted pie.
I opted to make an apple tarte tatin using honeycrisp apples. Unfortunately, the apples were greatly lacking in flavor, which left my final dessert a bit flat in terms of flavor. I enjoyed making the puff pasty and the caramel, but the apples were so flavorless that the finished dish was "meh" in my humble opinion. I don't fault the recipe or instructions in the slightest ... just the apples that were not prime. I kick myself for not sticking to my original idea of using Granny Smith apples. Darn!
This summer, I plan on making a plum tarte tatin, so stay tuned!!!
For the March Daring bakers’ challenge, Korena from Korena in the Kitchentaught us that some treats are best enjoyed upside down. She challenged us to make a tarte tatin from scratch.
I opted to make an apple tarte tatin using honeycrisp apples. Unfortunately, the apples were greatly lacking in flavor, which left my final dessert a bit flat in terms of flavor. I enjoyed making the puff pasty and the caramel, but the apples were so flavorless that the finished dish was "meh" in my humble opinion. I don't fault the recipe or instructions in the slightest ... just the apples that were not prime. I kick myself for not sticking to my original idea of using Granny Smith apples. Darn!
This summer, I plan on making a plum tarte tatin, so stay tuned!!!
For the March Daring bakers’ challenge, Korena from Korena in the Kitchentaught us that some treats are best enjoyed upside down. She challenged us to make a tarte tatin from scratch.
Labels:
Baking,
Daring Baker's Challenge,
tarte tatin
Wednesday, October 1, 2014
September 2014 Daring Bakers' Challenge: Kolaches
Whoops!!! Funny how your life can get turned on its ear when you have surgery! My apologies for the delayed Daring Bakers' reveal post... my nap schedule and foggy brain got the better of me. (Side note: all is going well and I'm recovering quite nicely.)
In September, we Daring Bakers were challenged (once again) to create something I've never heard of. I think that is one of the main reasons I really enjoy these monthly challenges. Most of the time, I am creating something completely new and out of my baking comfort zone.
Basically, Kolaches are a yeast-based sweet bun that is formed into a sweetened cheese-filled purse and then topped with a dollop of plum jam and a streussel-esque topping. Amazingly, I had JUST made plum jam courtesy a friend who shared part of her plum crop with me, so I was ready to go without a store run. How great is that??
I thought these treats were quite tasty. They reminded me of a cheese danish in some ways. They were definitely best warm. Eric found them a bit too doughy for his liking, however. I took the extras to work (Lord knows I didn't need to eat the entire batch by myself!) and got rave reviews from my co-workers.
The September Daring Bakers' challenge was brought to us by Lucie from ChezLucie. She challenged us to make a true Czech treat - Kolaches!
In September, we Daring Bakers were challenged (once again) to create something I've never heard of. I think that is one of the main reasons I really enjoy these monthly challenges. Most of the time, I am creating something completely new and out of my baking comfort zone.
Basically, Kolaches are a yeast-based sweet bun that is formed into a sweetened cheese-filled purse and then topped with a dollop of plum jam and a streussel-esque topping. Amazingly, I had JUST made plum jam courtesy a friend who shared part of her plum crop with me, so I was ready to go without a store run. How great is that??
I thought these treats were quite tasty. They reminded me of a cheese danish in some ways. They were definitely best warm. Eric found them a bit too doughy for his liking, however. I took the extras to work (Lord knows I didn't need to eat the entire batch by myself!) and got rave reviews from my co-workers.
The September Daring Bakers' challenge was brought to us by Lucie from ChezLucie. She challenged us to make a true Czech treat - Kolaches!
Labels:
Baking,
Baking bread,
Daring Baker's Challenge,
Kolaches
Sunday, July 27, 2014
The Daring Bakers July 2014: Cake with a Colorful Surprise
This month's baking challenge was all about internal surprises. Instead of focusing on the exterior of the cake, we were challenged to make the inside of a cake a colorful surprise. So, for the 4th of July, I decided to make a red, white, and blue cake. Ta da!
This challenge couldn't have been more timely. I decided to go for a patriotic theme for the 4th of July. My co-workers were thrilled (and wowed) with this pre-holiday treat. I used a go-to white cake recipe and colored it to replicate the colors of our flag.
Contrary to popular belief, this cake wasn't created by pouring concentric rings of batter around each other. Instead, this cake was made by pouring the cake batter on top of the previously-poured batter. As each ring is poured into the center of the cake pan, the previous rings are pushed out toward the edge a bit more. Cool, huh??
This challenge couldn't have been more timely. I decided to go for a patriotic theme for the 4th of July. My co-workers were thrilled (and wowed) with this pre-holiday treat. I used a go-to white cake recipe and colored it to replicate the colors of our flag.
Contrary to popular belief, this cake wasn't created by pouring concentric rings of batter around each other. Instead, this cake was made by pouring the cake batter on top of the previously-poured batter. As each ring is poured into the center of the cake pan, the previous rings are pushed out toward the edge a bit more. Cool, huh??
| Ready for the oven |
| Ready to stack the cakes; the colors remind me of rings in a tree |
| Stacked and frosted! |
For the July Daring Baker’s Challenge, Ruth from The Crafts of Mommyhood challenged us to bake a cake. But not just any cake; she asked us to add in a special surprise for our eyes as well as our taste buds!
Friday, June 27, 2014
Daring Bakers Challenge June 2014: Cinnamon Rolls
I am THRILLED to report that with this month's Daring Bakers challenge, I can end my decade-long search for the ideal cinnamon roll recipe. I FINALLY found it!
This month, we were challenged to make cinnamon rolls and could use any recipe that we wanted. In the far back corners of my brain, I recalled hearing that the best cinnamon rolls (characterized by a fluffy texture and weren't dry) contained mashed potatoes. Crazy, you say? Delish, I say!!
I scoured the Internet for mashed potato cinnamon roll recipes and found quite a few. The one I finally chose stood out because it contained a bit of a secret, unexpected ingredient: pumpkin pie spice.
This recipe, I kid you not, results in the best cinnamon rolls I have ever made... hands down. I'll be hard pressed to look beyond this recipe, t'boot. It makes A LOT of cinnamon rolls (a double batch of rather sizable rolls), so I wound up taking one pan to work.... and boy, were they a hit!!! The recipe doesn't provide icing information, so I just threw together a cream cheese icing and it worked beautifully.
Get a gander at how beautifully fluffy and moist the rolls turned out:
| Yummmmmmmmy! |
Without further ado, the amazingly wonderfully perfectly tasty cinnamon roll recipe I chose to try ... and wound up falling head over heels for:
Soft Homemade Cinnamon Rolls
Author: Rachel Ballard
Serves: 15
Ingredients
The Dough:
The Filling:
- 1 cup lump free mashed potatoes
- 1 cup reserved potato water (or plain water is fine)
- ¾ cup (1½ sticks) butter or margarine, melted
- ¾ cup sugar
- 2 teaspoons salt
- 1 cup hot water (just from the tap is fine, don't boil any)
- 2 envelopes yeast
- ½ cup WARM water
- 2 eggs
- 8½ cups all purpose flour
- ½ cup butter or margarine, softened
- ½ cup granulated sugar
- ½ cup brown sugar
- 1 tablespoon cinnamon
- ¼ teaspoon pumpkin pie spice (optional)
Instructions
- Combine the potatoes, potato water, butter, sugar, salt and hot water in a very large bowl.
- Mix well and set aside to cool to lukewarm.
- Combine the yeast and ½ cup warm water in a small bowl. Let rest 5 minutes.
- Add eggs, yeast, and 2 cups of the flour to the potato mixture.
- Using a dough hook and stand mixer (or mix by hand) blend well.
- Add flour, 1 cup at a time until a soft dough forms. This usually takes almost all 8 cups.
- Knead on a floured surface or with your dough hook until it's smooth and elastic about 4 to 6 minutes.
- Place in an oiled bowl and turn to coat all sides.
- Cover and rest one hour until doubled in size.
- Divide dough in half and roll one into a 12x18 inch rectangle.
- Mix the sugars, cinnamon, and pumpkin pie spice in a bowl.
- Spread half the butter on the dough and sprinkle on half the sugar mixture.
- Roll from the long side and cut slices about 2 inches thick.
- Place in a greased 9x13 pan.
- Repeat with other half of dough. (You can freeze rolls at this point if you want to)
- Cover and rise in a warm place 30-45 minutes until doubled
- Bake in 350 degree oven 25 to 35 minutes. Tent with foil if they get too dark.
- Cool 15 minutes and the drizzle with icing.
This month the Daring Bakers kept our creativity rolling with cinnamon bun inspired treats. Shelley from C Mom Cook dared us to create our own dough and fill it with any filling we wanted to craft tasty rolled treats, cinnamon not required!
Tuesday, May 27, 2014
May 2014 Daring Bakers' Challenge: Pao De Queijo
Please don't ask me how to pronounce this month's challenge. My high school German is rusty at best ... and my Spanish is practically non-existent, aside from asking where the bathroom is located, asking how to get to the beach, and ordering beer.
I'd never heard of this food and thought it would be an interesting challenge. Come to find out, the real challenge was getting my hands on the required tapioca starch. I looked high and low locally, but wound up having to order it from Amazon.
The dough came together really easily. (Easy project = good!!) We served them alongside some BBQ'd steaks and asparagus. We found the pao de queijo to be less flavorful that we expected. I think using a stronger cheese (Parmesan, perhaps?) instead of the called-for Jack would have gone a long way. Annika LOVED them and asked if we can have them every day. Conor didn't like them at all. Eric and I gave them a so-so review. Nothing bad, just nothing exceptional about them. I do, however, give them a thumbs up for ease. :)
This month's Daring Bakers' Challenge took us on a trip to beautiful Brazil! Renata of "Testado, Provado & Aprovado!" taught us how to make Pao De Queijo, tasty cheese buns that make the perfect snack or treat, and that will make your taste buds samba!
I'd never heard of this food and thought it would be an interesting challenge. Come to find out, the real challenge was getting my hands on the required tapioca starch. I looked high and low locally, but wound up having to order it from Amazon.
The dough came together really easily. (Easy project = good!!) We served them alongside some BBQ'd steaks and asparagus. We found the pao de queijo to be less flavorful that we expected. I think using a stronger cheese (Parmesan, perhaps?) instead of the called-for Jack would have gone a long way. Annika LOVED them and asked if we can have them every day. Conor didn't like them at all. Eric and I gave them a so-so review. Nothing bad, just nothing exceptional about them. I do, however, give them a thumbs up for ease. :)
| Ready for the oven |
![]() |
| Baking,baking,baking |
| All done |
![]() |
| First bite ... they're really HOT |
![]() |
| Crunchy outside, chewy inside...just like they're supposed to have! |
This month's Daring Bakers' Challenge took us on a trip to beautiful Brazil! Renata of "Testado, Provado & Aprovado!" taught us how to make Pao De Queijo, tasty cheese buns that make the perfect snack or treat, and that will make your taste buds samba!
Labels:
Baking,
Baking bread,
Daring Baker's Challenge,
Pao de queijo
Monday, January 27, 2014
January 2014 Daring Bakers Challenge: Baumkuchen
This month's Daring Bakers challenge was to make a baumkuchen (aka "tree cake"). The basic premise is the cake is comprised of teeny-tiny layers that are quickly made on top of each other. Traditionally, a baumkuchen is made (for lack of better terms) on a pole over a spit. The pole is dipped in a trough of batter and then slowly spun over the spit. The pole is re-dipped in the batter and then returned to the spit. (Repeat until lots of layers make up the finished cake)
Unfortunately, most people don't have spits in their kitchen (Conor spits in the kitchen from time to time, but that isn't quite the same, and often results in him sitting in time out for a little bit.... but I digress...)
I found a non-spit baumkuchen recipe that called for a springform pan and a broiler instead of a pole and a spit, so I gave it a try. I should have seen the writing on the wall when I realized how convoluted the recipe was and how poorly it was written. BIG RED FLAGS there.
The key to this month's challenge was the baking method, which I quickly discovered was not one to do while the kids were in the bath and nearing bedtime. The layered baking method required me to stand by the oven constantly, because I had to watch the cake to make sure each layer didn't burn under the broiler. Mind you, each layer only cooked about 1 1/2 minutes. It definitely wasn't a "mix the batter, put it in the oven, come back in 30 minutes after getting the kids' bathed and put into PJs" kind of experience.
After finishing the cake, I let it cook, drenched it in melted apricot preserves (side note: YUM), and then poured melted chocolate over the whole kit and caboodle.
The next day, we went to my brother's house to watch the Seahawks game (GO HAWKS) and I thought the cake would be a nice addition to the day. I was wrong. It was horrible. I mean "Eric took a bite and spit it into the sink" horrible. I choked down my bite, as did my brother, but I think that was it. The cake and all of the time put into it was a huge waste. Glad I tried a new baking method, not so glad on the recipe I used.
Public service announcement: NEVER USE THIS RECIPE!! http://www.food.com/recipe/baumkuchen-the-king-of-cakes-214171
At least I got my many, many layers!! They were just not exactly tasty layers... oh well. Live and learn!
The January 2014 Daring Bakers' challenge was hosted by Francijn of "Koken in de Brouwerij". She challenged us all to bake layered cakes in the tradition of Baumkuchen (tree cake) and Schichttorte (layered cake).
Labels:
baking failure,
Baumkuchen,
Daring Baker's Challenge,
Seahawks
Friday, December 27, 2013
December 2013 Daring Bakers Challenge: Whoopie Pies
It felt really silly to create more baked goods immediately after completing the marathon baking session that is Christmas, but oh well! I'm not one to shirk off a challenge... especially a baking one! :)
This month, we were challenged to make homemade whoopie pies. I chose the most direct route available, aka the first recipe listed in the challenge write-up. The main reason I chose it (aside from being listed first) was because it was a King Arthur Flour recipe and they tend to be quite reliable resources. The only change I made to the recipe was the size of the cookies; the original recipe called for using 1/4 cup of batter per cookie and that seemed like A LOT to me, so I used my 2 T scoop to measure out the dough instead. Because of the smaller cookies, I also changed the baking time to 11 minutes, down from the recipe's 15 minute bake time.
My plan was to make the cookies and then take them to my brother's house so we could eat them as our families watched the UW Huskies play in the Fight Hunger Bowl. As the saying goes, "the best laid plans of mice and men often go astray"... twas not meant to be. Our nephew has come down with a stomach bug (hopefully not the one our kids had a few days ago!) and we were kindly uninvited to watch the game at my brother's house. (Only other parents really understand how wonderful it was of them to call and warn us ahead of time!)
Now we have more whoopie pies than 4 people can shake a stick at! I still haven't had one, but they look promising... will know how they taste in a few hours! GO DAWGS!!
The December Daring Bakers' Challenge had us all cheering - the lovely and talented Bourbonnatrix of Bourbonnatrix Bakes was our hostess and challenged us to make fun, delicious and creative whoopie pies! Delicious little cake-like cookies sandwiching luscious filling in any flavors we chose... What else is there to say but "Whoopie!"
This month, we were challenged to make homemade whoopie pies. I chose the most direct route available, aka the first recipe listed in the challenge write-up. The main reason I chose it (aside from being listed first) was because it was a King Arthur Flour recipe and they tend to be quite reliable resources. The only change I made to the recipe was the size of the cookies; the original recipe called for using 1/4 cup of batter per cookie and that seemed like A LOT to me, so I used my 2 T scoop to measure out the dough instead. Because of the smaller cookies, I also changed the baking time to 11 minutes, down from the recipe's 15 minute bake time.
My plan was to make the cookies and then take them to my brother's house so we could eat them as our families watched the UW Huskies play in the Fight Hunger Bowl. As the saying goes, "the best laid plans of mice and men often go astray"... twas not meant to be. Our nephew has come down with a stomach bug (hopefully not the one our kids had a few days ago!) and we were kindly uninvited to watch the game at my brother's house. (Only other parents really understand how wonderful it was of them to call and warn us ahead of time!)
Now we have more whoopie pies than 4 people can shake a stick at! I still haven't had one, but they look promising... will know how they taste in a few hours! GO DAWGS!!
![]() |
| Whoopie pies, captured with my new LensBaby lens! |
Friday, November 29, 2013
November Daring Bakers Challenge: Sfogliatelle
Who knew that making ricotta was so easy??? Well, know I do! This month's Daring Bakers Challenge was to make Sfogliatelle and one of the required elements was making the ricotta from scratch. Easy and SOOOOO good! Unfortunately, the picture of my ricotta is currently missing. Just use your imagination to visualize a lovely blob of white ricotta. :)
The sfogliatelle is a pastry wrapped around a ricotta/candied orange filling. To be honest, I wasn't quite sure what to expect, but was thinking it would be sort of like a filled doughnut. Boy, I was wrong. The ricotta was absorbed into the pastry, creating a lovely flavor without any goo. Can't complain!!
Sandie of the lovely blog, Crumbs of Love, was our November hostess. Sandie challenged us to make a traditional Italian dessert, along with its American version – Sfogliatelle (or better known in the US – lobster tails!) The flakey, 1000 layers of super thin dough, shaped into a horn and filled with a scrumptious filling. Così buono!
The sfogliatelle is a pastry wrapped around a ricotta/candied orange filling. To be honest, I wasn't quite sure what to expect, but was thinking it would be sort of like a filled doughnut. Boy, I was wrong. The ricotta was absorbed into the pastry, creating a lovely flavor without any goo. Can't complain!!
Sandie of the lovely blog, Crumbs of Love, was our November hostess. Sandie challenged us to make a traditional Italian dessert, along with its American version – Sfogliatelle (or better known in the US – lobster tails!) The flakey, 1000 layers of super thin dough, shaped into a horn and filled with a scrumptious filling. Così buono!
Friday, November 1, 2013
October Daring Bakers Challenge: Savory Pie
While at a Halloween party last night, I had an "OH CRUD" moment when I realized I neglected to post the October Daring Bakers Challenge on time. My trip to Vegas sure messed with my sense of time!
SO, without further ado.... my savory pie!
This challenge was PERFECT for me this month. October is proving to be an insanely busy month and I had pot roast leftovers that needed to be spruced up a bit. So, I sauteed some onions, potato, carrots, and celery, added the pot roast leftovers and gravy, threw in a bit of this and a little of that (aka seasonings and spices), scooped it all into my go-to homemade pie crust, added vents with a small cookie cutter, splashed it with an egg wash, and popped it into the oven. Fast, easy, tasty! Ta da!
Hannah of Rise and Shine was our October 2013 Daring Bakers’ hostess and she challenged us to bake our own double crusted savory pot pies. Using any from-scratch crust and filling we choose, we were allowed to get completely creative with our recipe, showing off the savory flavors and fillings from our own home or region.
SO, without further ado.... my savory pie!
This challenge was PERFECT for me this month. October is proving to be an insanely busy month and I had pot roast leftovers that needed to be spruced up a bit. So, I sauteed some onions, potato, carrots, and celery, added the pot roast leftovers and gravy, threw in a bit of this and a little of that (aka seasonings and spices), scooped it all into my go-to homemade pie crust, added vents with a small cookie cutter, splashed it with an egg wash, and popped it into the oven. Fast, easy, tasty! Ta da!
![]() |
| Perfect dinner on a wet and chilly autumn evening. |
Hannah of Rise and Shine was our October 2013 Daring Bakers’ hostess and she challenged us to bake our own double crusted savory pot pies. Using any from-scratch crust and filling we choose, we were allowed to get completely creative with our recipe, showing off the savory flavors and fillings from our own home or region.
Labels:
Daring Baker's Challenge,
Leftovers,
Savory Pie
Saturday, July 27, 2013
July Baking Challenge: Eenie Meenie Miney Moe
This month's baking challenge was super easy and super hard all in one. We had the opportunity to go back through past challenges and pick one that appealed to us. Naturally, just about ALL of the past challenges sounded great and like possibilities, but after much contemplating, I chose to make challah (again). The main reason behind this decision was I've been hankering for really good French toast and nothing makes better French toast than challah.
Our dear family friend, Barb Simon, has supplied me with a few wonderful challah recipes over the years and I chose to make one of the recipes she sent to me along the say. (Thanks, Mrs. Simon!!!)
With this bread (makes 2 loaves, even though only one is shown below), I decided to return to the dreaded 6-strand braid. I found a resource online that explained it VERY clearly and now, I find the 6-strand braid a snap. Yippee!!!
In a "celebration" of past Daring Baker and Daring Cook challenges, Lisa challenged all of us to search through the Daring Kitchen archives and pick any one we'd like! The REAL challenge was picking which delicious recipe(s) to try!
Our dear family friend, Barb Simon, has supplied me with a few wonderful challah recipes over the years and I chose to make one of the recipes she sent to me along the say. (Thanks, Mrs. Simon!!!)
With this bread (makes 2 loaves, even though only one is shown below), I decided to return to the dreaded 6-strand braid. I found a resource online that explained it VERY clearly and now, I find the 6-strand braid a snap. Yippee!!!
In a "celebration" of past Daring Baker and Daring Cook challenges, Lisa challenged all of us to search through the Daring Kitchen archives and pick any one we'd like! The REAL challenge was picking which delicious recipe(s) to try!
Monday, July 1, 2013
June Daring Bakers Challenge: The Life of Pie
Funny thing about going on vacation... no Internet access! Hence this month's baking challenge post is a wee bit late.
This month was THE PERFECT challenge for me: (A) it was a pie challenge and (B) it wasn't a time-consuming project, which was perfect considering how busy June has been for us. I think I set a record for how early I completed a monthly challenge; we got the challenge on the 1st and I completed it on the 2nd. We had a family get-together and I was in charge of dessert... how perfect!
I had hoped to make the chocolate caramel pie and the crack pie, but then realized that I was going to wind up making WAAAAAY more dessert than our group needed. So, I stuck with the crack pie and called it good at that.
I had never heard of a crack pie (and our group had no shortage of crack jokes during the baking, serving, and eating processes!) but thought it sounded like a good one to try, so there you go! As it turns out, crack pie is basically a pecan pie without the pecans and with a slightly different crust. BTW, LOVED the oat-based crust of this pie. Really tasty!!
Our entire group really liked the pie and I am definitely going to add it to my binder of recipes so I can make it again!
Blog checking lines: Rachael from pizzarossa was our lovely June 2013 Daring Bakers’ host and she had us whipping up delicious pies in our kitchens! Cream pies, fruit pies, chocolate pies, even crack pies! There’s nothing like pie!
Crack Pie
Preparation time: 20 + 20 minutes
Baking time: 18 + 50 minutes
Cooling time: 1 hour + 2 hours, approx.
Chilling time: overnight
This month was THE PERFECT challenge for me: (A) it was a pie challenge and (B) it wasn't a time-consuming project, which was perfect considering how busy June has been for us. I think I set a record for how early I completed a monthly challenge; we got the challenge on the 1st and I completed it on the 2nd. We had a family get-together and I was in charge of dessert... how perfect!
I had hoped to make the chocolate caramel pie and the crack pie, but then realized that I was going to wind up making WAAAAAY more dessert than our group needed. So, I stuck with the crack pie and called it good at that.
I had never heard of a crack pie (and our group had no shortage of crack jokes during the baking, serving, and eating processes!) but thought it sounded like a good one to try, so there you go! As it turns out, crack pie is basically a pecan pie without the pecans and with a slightly different crust. BTW, LOVED the oat-based crust of this pie. Really tasty!!
Our entire group really liked the pie and I am definitely going to add it to my binder of recipes so I can make it again!
Blog checking lines: Rachael from pizzarossa was our lovely June 2013 Daring Bakers’ host and she had us whipping up delicious pies in our kitchens! Cream pies, fruit pies, chocolate pies, even crack pies! There’s nothing like pie!
Crack Pie
Preparation time: 20 + 20 minutes
Baking time: 18 + 50 minutes
Cooling time: 1 hour + 2 hours, approx.
Chilling time: overnight
- 5 1/2 tablespoons (85 ml)(2½ oz) (70 gm) (packed) light brown sugar, divided
- 2 tablespoons (30 ml) (30 gm) (1 oz) white sugar
- 1 large egg
- 3/4 cup plus 2 tablespoons (210 ml) (80 gm) (2¾ oz) old-fashioned oats
- 1/2 cup (120 ml) (2½ oz) (70 gm) all-purpose flour
- 1/8 teaspoon (2/3 gm) baking powder
- 1/8 teaspoon (2/3 gm) baking soda
- 1/4 teaspoon (1½ gm) salt
- 1/2 cup (packed) (120 ml) (100 gm) (3½ oz) light brown sugar
- 1 tablespoon (15 ml) (8 gm) (¼ oz) dry milk powder
- 1/4 teaspoon (1½ gm) salt
- 1/2 cup (1 stick) (120mlk) (4 oz) (115gm) unsalted butter, melted, cooled slightly
- 6 1/2 tablespoons (100ml) heavy whipping cream
- 4 large egg yolks
- 1 teaspoon vanilla extract
- Powdered sugar for dusting
Directions:
Oat Cookie Crust
1.
Position rack in center of oven and preheat to moderate 350°F/180°C/gas
mark 4. Line a 13x9x2 inch/33x22x5cm metal baking pan with parchment
(baking) paper. Lightly spray or butter a 9 inch/22cm diameter glass or
ceramic pie dish.
2.
Combine 6 tablespoons (85 gm) of the softened butter, 4 tablespoons (50
gm) of the brown sugar and the white sugar in medium bowl. Using an
electric mixer, beat until light and fluffy, about 2 minutes.
3. Add egg and beat until pale and fluffy, about 1 minute.
4. Add oats, flour, baking powder, baking soda, and salt and beat until well blended, about 1 minute.
5. Dump oat mixture into prepared baking pan and press out evenly to edges of pan.
6. Bake until light golden, 18 minutes. Transfer baking pan to wire rack and cool cookie completely, about an hour.
7.
Using your fingertips, crumble the cookie a into large bowl - there
should be no identifiable pieces of cookie remaining. Add the remaining 3
tablespoons (45 gm) butter and 1-1/2 tablespoons (20 gm) brown sugar.
Rub in with your fingertips until the mixture is moist and sticks
together when pressed between your fingers.
8. Transfer cookie crust mixture to pie dish. Using your fingers, press mixture evenly onto bottom and up sides of pie dish (about 1 inch/2.5cm up the sides if your pie dish is deep). If your pie dish is shallow, place it on a baking sheet in case of overflow.
Filling
1. Position rack in center of oven and preheat to moderate
350°F/180°C/gas mark 4. If possible, use bottom-only heat, or the
filling may brown too quickly.
2. Whisk both sugars, milk powder, and salt together in a medium bowl.
3. Add melted butter and whisk until blended.
4. Add cream, then egg yolks and vanilla and whisk until well blended.
5. Pour filling into crust.
6.
Bake 30 minutes (filling may begin to bubble up). Reduce oven
temperature to 325°F/160°C/gas mark 3. Continue to bake until filling is
brown on top and set around edges but center still jiggles slightly,
about 20 minutes longer.
7. Cool pie completely in pie dish on wire rack. Chill uncovered overnight.
8. Sift powdered sugar lightly over top of pie. Cut pie into thin wedges and serve cold.
Monday, May 27, 2013
May Daring Kitchen Challenge: Swedish Prinsesstårta
Talk about taking a challenge down to the wire! I just, just, just finished this month's challenge. It wasn't for lack of interest, just a lack of time. This time of year seems to be when things get busier and time flies by faster than expected. I'm stunned that June is just around the corner!!
This month, we were challenged to create a Swedish Prinsesstårta (aka Swedish Princess Cake). The cake is a single sponge cake that is cut horizontally into thirds. In between the first and second layers are raspberry jam and a pastry cream. Between the second and third layers are more pastry cream and a dome of whipping cream. The cake is topped with marzipan, which is traditionally colored green, and is garnished with a marzipan rose.
I asked Annika what color our cake's outside should be (she didn't know the cakes are traditionally green) and she responded, "My favorite color, of course! Green!"
After many failed attempts at the marzipan rose, I changed gears and made a polka dotted marzipan bow instead. Eric asked if it was a bow tie and I decided it was as a nod to Matt Smith's portrayal of Dr. Who.
Once I got the polka dots in place, I proclaimed that the cake was finished. Annika, quite perplexed, asked, "but what about the princess??" I'm fairly certain she was expecting a princess cake like the one I made for her 3rd birthday.
Through this process, we discovered that Annika is a HUGE marzipan fan. As I trimmed here and there, she happily disposed of the scraps and asked for more.
The final result was ok, but nothing to write home about. As Eric put it, it's a jam sandwich with whipping cream on hard bread. I took a bite and agreed with his review. I was concerned that the cake as a whole would be dry, which is wasn't thanks to the whipping cream, but the sponge cake edges were kind of crisp. In addition, the pastry cream didn't turn out as silky as other pastry creams I've made in the past; I don't know if I did something wrong or if it just isn't an overly smooth pastry cream. I ran it through a sieve, but still wound up with little lumps.
Even though the results weren't mind blowing, I'm still grateful to have had the opportunity to make a new dessert from a different culture. Much to Eric's grandfather's chagrin (tee hee hee), I do have some Swedish blood in me, so it was neat to have a Swedish-based challenge.
Korena of Korena in the Kitchen was our May Daring Bakers’ host and she delighted us with this beautiful Swedish Prinsesstårta!
This month, we were challenged to create a Swedish Prinsesstårta (aka Swedish Princess Cake). The cake is a single sponge cake that is cut horizontally into thirds. In between the first and second layers are raspberry jam and a pastry cream. Between the second and third layers are more pastry cream and a dome of whipping cream. The cake is topped with marzipan, which is traditionally colored green, and is garnished with a marzipan rose.
I asked Annika what color our cake's outside should be (she didn't know the cakes are traditionally green) and she responded, "My favorite color, of course! Green!"
After many failed attempts at the marzipan rose, I changed gears and made a polka dotted marzipan bow instead. Eric asked if it was a bow tie and I decided it was as a nod to Matt Smith's portrayal of Dr. Who.
Once I got the polka dots in place, I proclaimed that the cake was finished. Annika, quite perplexed, asked, "but what about the princess??" I'm fairly certain she was expecting a princess cake like the one I made for her 3rd birthday.
Through this process, we discovered that Annika is a HUGE marzipan fan. As I trimmed here and there, she happily disposed of the scraps and asked for more.
The final result was ok, but nothing to write home about. As Eric put it, it's a jam sandwich with whipping cream on hard bread. I took a bite and agreed with his review. I was concerned that the cake as a whole would be dry, which is wasn't thanks to the whipping cream, but the sponge cake edges were kind of crisp. In addition, the pastry cream didn't turn out as silky as other pastry creams I've made in the past; I don't know if I did something wrong or if it just isn't an overly smooth pastry cream. I ran it through a sieve, but still wound up with little lumps.
Even though the results weren't mind blowing, I'm still grateful to have had the opportunity to make a new dessert from a different culture. Much to Eric's grandfather's chagrin (tee hee hee), I do have some Swedish blood in me, so it was neat to have a Swedish-based challenge.
| My "Dr. Who" Prinsesstårta |
| Pretty layers! |
Korena of Korena in the Kitchen was our May Daring Bakers’ host and she delighted us with this beautiful Swedish Prinsesstårta!
Saturday, April 27, 2013
April 2013 Daring Bakers Challenge: Savarin
This month's Daring Bakers challenge was to make a savarin, which is a yeast-based cake. I'd never heard of this kind of cake and was anxious to give it a try.
The savarin began much as many of my bread recipes do ... by creating a yeast-based sponge. After letting it come to life, the sponge was incorporated into the remaining ingredients and left to rise. Fortunately for me, I had a very good supervisor (aka Conor) who oversaw much of the process. After creating the dough, I was instructed to poke a hole in the middle of the dough and then place it in a savarin pan, I used my standard bundt pan and think it worked grand and dandy. My dough never puffed up to the top of the pan, like the instructions indicated, but, again, I don't think that made a big difference.
As the cake baked, I made the pastry cream (YUM). I also made the flavored soaking syrup. This is where I deviated from the original recipe a bit.The original recipe called for peach tea and peach syrup, neither of which were in our pantry. Instead, I used the kiwi liquor that Eric and I bought in New Zealand back in 2003 but had never opened. Of course, we had to sample it before using it in the recipe. My, but that stuff was tasty!!
After the cake was done baking, I let it cool and decided to follow the recipe's suggestion of letting it dry out a bit so it could soak up more of the syrup. Unfortunately, I think I let it dry out too much. The final product was a bit on the dry side. On an up note, the lemon zest added to the pastry cream was amazing!
The savarin began much as many of my bread recipes do ... by creating a yeast-based sponge. After letting it come to life, the sponge was incorporated into the remaining ingredients and left to rise. Fortunately for me, I had a very good supervisor (aka Conor) who oversaw much of the process. After creating the dough, I was instructed to poke a hole in the middle of the dough and then place it in a savarin pan, I used my standard bundt pan and think it worked grand and dandy. My dough never puffed up to the top of the pan, like the instructions indicated, but, again, I don't think that made a big difference.
As the cake baked, I made the pastry cream (YUM). I also made the flavored soaking syrup. This is where I deviated from the original recipe a bit.The original recipe called for peach tea and peach syrup, neither of which were in our pantry. Instead, I used the kiwi liquor that Eric and I bought in New Zealand back in 2003 but had never opened. Of course, we had to sample it before using it in the recipe. My, but that stuff was tasty!!
After the cake was done baking, I let it cool and decided to follow the recipe's suggestion of letting it dry out a bit so it could soak up more of the syrup. Unfortunately, I think I let it dry out too much. The final product was a bit on the dry side. On an up note, the lemon zest added to the pastry cream was amazing!
| Sponge |
| Working the sponge into the dough |
| My manager |
| Mixin, mixin, mixin |
| Nothing gets past this guy! |
| Dough ready for the pan |
| Rising complete, ready for the oven |
![]() |
| YUM |
![]() |
| Annika and Conor modeling the final savarin |
| Savarin |
Natalia of Gatti Fili e Farina challenges us to make a traditional Savarin, complete with soaking syrup and cream filling! We were to follow the Savarin recipe but were allowed to be creative with the soaking syrup and filling, allowing us to come up with some very delicious cakes!
Wednesday, March 27, 2013
March 2013 Daring Bakers Challenge
It's baking challenge reveal day! And, boy, am I glad that I have a reminder on my phone's calendar to keep me on top of things. I would have completely forgotten to post about this month's Daring Bakers challenge had it not just beeped at me.
This month, we were tasked with incorporating at least one vegetable into a dessert. As soon as I read the challenge description, I knew what I was going to make. When I was a kid, my mom used to make a really yummy chocolate cake that had zucchini tucked inside for added moisture.
I called my mom and asked for the recipe. When she called me back with it, I was folding laundry and really didn't have any writing implements at hand. I ran to the kids' art bin and found a piece of brown construction paper and a red crayon. Perfect! I scribbled down the recipe and half considered keeping it in that format, but decided it would be more prudent to write it out in longhand for future use. Darn you, logic, you won again!
This cake's origins are a bit unclear. My mom couldn't recall if she got the recipe from her friend Mary or if her friend Mary gave the recipe to her. Either way, it is now in my possession and because my mom gave it to me, I'm taking over the naming rights.
I baked the cake this weekend. Much to our niece Emily's amazement, the kids and I had this baby out of the oven and on a cooling rack by 7:30 AM! (Welcome to life with young children!)
I figured we could use this cake for Conor's actual birthday (tomorrow!!!) and then the fancier cake for his family gathering on Sunday (aka Easter). Because we're saving the cake until tomorrow, please imagine the cake below is sliced and has a lovely dusting of powdered sugar on top!
I almost forgot to take a picture of the cake, so had to unwrap it from its Saran and foil coverings ... hence the less than grand picture.
This month, we were tasked with incorporating at least one vegetable into a dessert. As soon as I read the challenge description, I knew what I was going to make. When I was a kid, my mom used to make a really yummy chocolate cake that had zucchini tucked inside for added moisture.
I called my mom and asked for the recipe. When she called me back with it, I was folding laundry and really didn't have any writing implements at hand. I ran to the kids' art bin and found a piece of brown construction paper and a red crayon. Perfect! I scribbled down the recipe and half considered keeping it in that format, but decided it would be more prudent to write it out in longhand for future use. Darn you, logic, you won again!
This cake's origins are a bit unclear. My mom couldn't recall if she got the recipe from her friend Mary or if her friend Mary gave the recipe to her. Either way, it is now in my possession and because my mom gave it to me, I'm taking over the naming rights.
I baked the cake this weekend. Much to our niece Emily's amazement, the kids and I had this baby out of the oven and on a cooling rack by 7:30 AM! (Welcome to life with young children!)
I figured we could use this cake for Conor's actual birthday (tomorrow!!!) and then the fancier cake for his family gathering on Sunday (aka Easter). Because we're saving the cake until tomorrow, please imagine the cake below is sliced and has a lovely dusting of powdered sugar on top!
I almost forgot to take a picture of the cake, so had to unwrap it from its Saran and foil coverings ... hence the less than grand picture.
Nana's Chocolate Zucchini Cake
Ingredients
- 1 c. brown sugar
- ½ c. white sugar
- ½ c. butter
- ½ c. vegetable oil
- 3 eggs
- 1 tsp. vanilla
- ½ c. buttermilk
- 2 ½ c. flour
- ½ tsp. all spice
- ½ tsp. cinnamon
- ¼ tsp. ground clove
- ½ tsp. salt
- 2 tsp. baking soda
- 4 T. cocoa powder
- 2 zucchini (grated = 2 c.)
- 1 c. chocolate chips
Directions
- Preheat oven to 325F.
- In mixer bowl, cream together sugars, butter, and oil.
- Add eggs, vanilla, and buttermilk.
- Add flour, all spice, cinnamon, clove, salt, baking soda, and cocoa powder.
- Fold in zucchini.
- Pour batter into greased bundt pan.
- Sprinkle chocolate chips on top of batter.
- Bake at 325 for 45 minutes.
- Cool in pan for 10 minutes, then invert cake onto cooling rack.
- Sift powdered sugar over cake before slicing.
-
Wednesday, February 27, 2013
February 2013 Daring Bakers Challenge: Crisp Crackers and Flatbreads
It is funny how some months fly by so fast that I have to scramble to complete the month's Daring Bakers challenge. This month was the antithesis of those months. I completed this month's challenge on the 2nd or 3rd. The reason behind my speedy completion? There were actually two reasons. First, the recipes were pretty fast to complete. Second, the recipes didn't require ingredients that were hard to find ... because they were all in our kitchen. Can't complain about that!
This month, we were tasked with making crisp crackers and/or flatbread. Being the overachiever that I am, I decided to make one of each. I wound up making homemade graham crackers and crisp rosemary flatbread.
It is no secret that I adore the Smitten Kitchen food blog. That gal is a culinary god... you'll definitely agree once you see how small her kitchen is! I chose her graham cracker recipe and am so glad that I did. They turned out amazingly well. The shocker? No graham flour was used. I read the recipe 6-7 times before I believed it. These little yummy treats were flavorful, crunchy, and topped with cinnamon sugar. (Eric said they were too crispy and nuked them for a few seconds before eating them ... what can I say? I married a guy who likes stale graham crackers. I don't get it either!) ;)
Next, I tackled the the Smitten Kitchen crisp rosemary flatbread recipe. I was less in love with the results of this adventure. The crisp flatbread turned out less crisp and more dense than I expected; imagine almost like a pita texture. I don't know if I did something wrong or simply didn't roll out the dough thin enough. Either way, I wouldn't call this flatbread crisp.
The other issue I had was I didn't have fresh rosemary on hand; instead I used dry. Not wanting to overpower the bread with rosemary, I went too cautious and under rosemary-ed the dough. Its flavor was a bit flat (no pun intended) and lacked the lovely punch of rosemary flavor I'd hoped for. I think I'll try this recipe again, but with thinner dough and fresh rosemary.
Can't wait to see what is in store for March's challenge!!
Sarah from All Our Fingers in the Pie was our February 2013 Daring Bakers’ host and she challenges us to use our creativity in making our own Crisp Flatbreads and Crackers!
This month, we were tasked with making crisp crackers and/or flatbread. Being the overachiever that I am, I decided to make one of each. I wound up making homemade graham crackers and crisp rosemary flatbread.
It is no secret that I adore the Smitten Kitchen food blog. That gal is a culinary god... you'll definitely agree once you see how small her kitchen is! I chose her graham cracker recipe and am so glad that I did. They turned out amazingly well. The shocker? No graham flour was used. I read the recipe 6-7 times before I believed it. These little yummy treats were flavorful, crunchy, and topped with cinnamon sugar. (Eric said they were too crispy and nuked them for a few seconds before eating them ... what can I say? I married a guy who likes stale graham crackers. I don't get it either!) ;)
| Graham crackers |
Next, I tackled the the Smitten Kitchen crisp rosemary flatbread recipe. I was less in love with the results of this adventure. The crisp flatbread turned out less crisp and more dense than I expected; imagine almost like a pita texture. I don't know if I did something wrong or simply didn't roll out the dough thin enough. Either way, I wouldn't call this flatbread crisp.
The other issue I had was I didn't have fresh rosemary on hand; instead I used dry. Not wanting to overpower the bread with rosemary, I went too cautious and under rosemary-ed the dough. Its flavor was a bit flat (no pun intended) and lacked the lovely punch of rosemary flavor I'd hoped for. I think I'll try this recipe again, but with thinner dough and fresh rosemary.
| Crisp(ish) rosemary flatbread |
Can't wait to see what is in store for March's challenge!!
Sarah from All Our Fingers in the Pie was our February 2013 Daring Bakers’ host and she challenges us to use our creativity in making our own Crisp Flatbreads and Crackers!
Sunday, January 27, 2013
January's Daring Bakers Challenge: Gevulde Speculaas
I have no idea where January went, but suddenly I found myself QUICKLY looking at the deadline for this month's baking challenge, which was a Dutch pastry called gevulde speculaas. I was intrigued by this challenge because (a) I'd never heard of gevulde speculaas before and (b) it required me to make my own almond paste. Cool!
Fortunately for my 11th-hour approach to this month's challenge, the recipe wasn't difficult to complete in a timely fashion. I made the almost paste last night and let it sit in the refrigerator overnight. I saved myself quite a bit of time by purchasing almonds without their skins (whew). This morning, I made the dough, assembled the layers of dough and almond paste, and then baked the final product.
The original recipe called for whole almonds to be placed on top, but I had plenty of the slivered almonds (and no whole almonds), so used those instead. (The kids enjoyed helping me sprinkle the almonds... Conor also enjoyed poking his finger through the layers in of dough and almond paste in the pan... whoops!)
The final product smelled really good (and reminded us of how our kitchen smells when I make molasses cookies) and tasted quite yummy, too. I've decided they'd be ideal with a dollop of whipped cream on top for a little added "ooomph". All in all, this gets our thumbs up!
Francijn of Koken in de Brouwerij was our January 2013 Daring Bakers’ Hostess and she challenged us to make the traditional Dutch pastry, Gevulde Speculaas from scratch! That includes making our own spice mix, almond paste and dough! Delicious!
Fortunately for my 11th-hour approach to this month's challenge, the recipe wasn't difficult to complete in a timely fashion. I made the almost paste last night and let it sit in the refrigerator overnight. I saved myself quite a bit of time by purchasing almonds without their skins (whew). This morning, I made the dough, assembled the layers of dough and almond paste, and then baked the final product.
The original recipe called for whole almonds to be placed on top, but I had plenty of the slivered almonds (and no whole almonds), so used those instead. (The kids enjoyed helping me sprinkle the almonds... Conor also enjoyed poking his finger through the layers in of dough and almond paste in the pan... whoops!)
The final product smelled really good (and reminded us of how our kitchen smells when I make molasses cookies) and tasted quite yummy, too. I've decided they'd be ideal with a dollop of whipped cream on top for a little added "ooomph". All in all, this gets our thumbs up!
Francijn of Koken in de Brouwerij was our January 2013 Daring Bakers’ Hostess and she challenged us to make the traditional Dutch pastry, Gevulde Speculaas from scratch! That includes making our own spice mix, almond paste and dough! Delicious!
Subscribe to:
Posts (Atom)
.jpg)